![[7] Images](images/images.gif)
At last we can now spice
up our web pages with loads of
c
o
l
o
r
f
u
l
images.
There are two main types of images which are commonly used on web pages. These are
gif and
jpeg images. One advantage of using the
gif image is that
it is possible to produce
Animated gif's (more on this later) without learning any
fancy language like
Java. The
Gif image is limited 256 colours. If you want to display
images with more colours then you will need to use the
Jpeg image format.
But this means bigger files, which take longer to load.
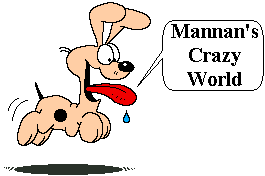
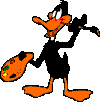
In order to display the images we use the image screen element <img scr=" filename.gif">. Note there is no closing tag element associated with the <img> element. To display an image called crazydog.gif and daffy.gif then you would type the following
<img src="crazydog.gif"> <img src="daffy.gif">
This should display an image of odie the dog along with daffy duck next to each other.
To set up a link from an image, we just place the image statement between the anchor elements as discussed
in the
previous section.
For example if we wish to setup a link to the contents menu for the learning zone, by clicking on the image called
daffy.gif then we would type the following
<a href="learningHtml.html">
<img src="daffy.gif">
</a>
This will display an image of Daffy duck which provides a link back to the contents menu of the learning zone. The border around the image of daffy indicates a hyperlink.
I personally do not like borders which are placed around some images, which you hyperlink. To get round this, we use the border attribute. Setting the border value to zero will eliminate the border. You can also control the thickness of the border by setting it to a value greater than zero. This is illustrated below.
<center>
<a href="learninghtml.html">
<img src=" daffy.gif" border="0">
</a>
<br>
<a href="learninghtml.html">
<img src="daffy.gif" border="5">
</a>
</center>
This should display two images of daffy, centrally on the screen. The right-hand image is surrounded by a border 5 pts thick. Both images provide a link to the contents page. Note that you can specify a border around images even if they are not hyperlinked.
How do we position the images on the page i you cry?
The align attribute is used to align the image with respect to the
text on the screen.
Here Daffy is aligned to the left hand side of the screen using the attribute
align as shown below
<img src=" daffy.gif" align="left ">
All the text wraps to the right hand side of the image.
To keep everyone happy it you can also align daffy to the right hand side of the screen as shown below
<img src=" daffy.gif" align="Right ">
This time the text wraps to the left hand side of the image.
This is a good place to introduce the clear attribute which can be used with the <br> element. The clear attribute is useful in situations were the images are aligned as above and the text neatly wraps next to the image.
A normal <br> would on introduce a single line break. By using the clear attribute it is possible to introduce multiple line breaks. The clear attribute can take the following values
<br clear="left" > - This will repeatedly introduce a line break until their is a clear Left margin.
<br clear="Right" > - This will repeatedly introduce a line break until their is a clear Right margin.
<br clear="All" > - This will repeatedly introduce a line break until their is a clear Left and Right margin.
Using align="top" will align the top part of
the image of
with the top of the current item in the line.
Using align="middle" will align the middle of
the image of
with the current item in the line.
Finally using align="bottom" will align the bottom of
the image of
with the bottom of the current item in the line.
We all know how slow the internet is at times, and therefore some people turn off the images to speed up the
down loads. This is were the attribute ALT is extremely useful, since it will
display alternative text in the place of the turned off images. SO YOU should provide alternative text also,
to take account of this eventuality. Note those of us who use Internet explorer, the alternative text also
appears as a tooltip.
Using the ALT attribute could not be simpler, it is just inserted into
the <img> element as shown below.
<img src="daffy.gif " align="Right " ALT="Mannan's crazy world">